Sod Installation: How to Ensure a Healthy Start for Your Lawn 🌱
Dreaming of a lush, green lawn that feels like a soft carpet underfoot? Sod installation might just be your quickest route to achieving that dream. However, simply rolling out sod isn't enough to guarantee a healthy lawn. Let's dive into how you can give your sod the best start possible!
Table of Contents
1. Preparation: Setting the Stage
2. Installation: Rolling Out the Green Carpet
3. Aftercare: Nurturing Your New Lawn
4. Conclusion: The Path to a Perennial Paradise
5. FAQs: Your Sod Queries Answered

Preparation: Setting the Stage 🛠️
Before you lay the first piece of sod, preparation is key. Think of it as the foundation of your new lawn.
Test and Treat Your Soil: Start by testing your soil's pH level. You can find affordable testing kits at garden centers. Most grasses prefer a pH between 6.0 and 7.5. Adjust accordingly with lime or sulfur to get your soil in the optimal range.

Clear the Area: Remove any existing grass, weeds, or debris. This gives your new sod a clean slate to grow on. A well-prepped surface equals a smoother installation.
Level the Ground: Use a rake to level the soil, filling in low spots and breaking up clumps. This ensures consistent contact between the sod and soil.
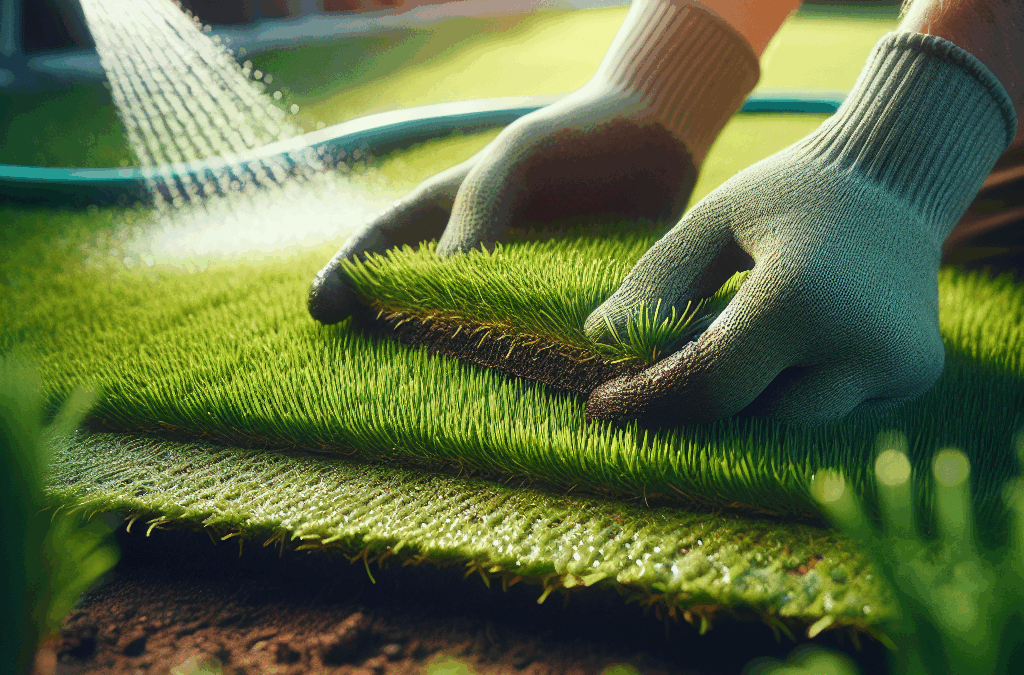
Installation: Rolling Out the Green Carpet 🌿
Now comes the exciting part—laying down your sod!
Timing is Everything: Install sod as soon as possible after delivery to avoid drying out. Ideally, choose a cloudy day to prevent the sun from scorching the fresh sod.
Lay It Right: Start by laying the first row along a straight edge, like a driveway. Stagger the joints like bricks in a wall to avoid creating seams that could dry out.
Water, Water, Water: Give your new lawn a good soaking immediately after installation. The goal is to keep the sod and the top inch of soil consistently moist until the roots establish.
Aftercare: Nurturing Your New Lawn 🌧️
Your sod's success depends largely on how you care for it in the first few weeks.
Water Wisely: Continue to water daily (or more if the weather is particularly hot) for the first two weeks. Once established, switch to less frequent, deeper watering to encourage deep root growth.
Mow with Caution: Wait until your grass reaches about 3 inches before mowing for the first time. Make sure your mower blade is sharp and set to remove no more than one-third of the grass height.
Fertilize Thoughtfully: After about six weeks, apply a balanced fertilizer to encourage healthy growth. Follow package instructions to avoid over-fertilizing, which can burn your lawn.
Conclusion: The Path to a Perennial Paradise 🌻
With careful preparation, precise installation, and diligent aftercare, your sod will transform into a thriving lawn that’s the envy of the neighborhood. Remember, patience is key. Your lawn is an investment that will pay off with years of enjoyment.
FAQs: Your Sod Queries Answered ❓
Q1: How soon can I walk on my new sod?
A: It's best to avoid walking on your sod for at least two weeks to allow the roots to establish.
Q2: What type of grass should I choose for my sod?
A: This depends on your climate and yard conditions. Consult with your local garden center for recommendations best suited for your area.
Q3: How can I tell if my sod is taking root?
A: Gently lift a corner of the sod. If there’s resistance, the roots are taking hold. Also, look for new growth as a sign of successful rooting.
With these tips and some tender loving care, your new sod will grow into the lush, green lawn of your dreams. Happy gardening! 🌿

sod installation company near me Rockwall Texas

outdoor lighting contractors near me Dallas Texas

sod installation cost Dallas Texas

sod installation companies near me Frisco Texas

yard drainage specialist near me Preston Hollow Dallas Texas

Fate TX covered patios | Keathley Landscaping

outdoor drain repair Highland Park Texas

landscape lighting installer Murphy Texas

Murphy TX pergola builders | Keathley Landscaping

sod installation company Preston Hollow Dallas Texas

Lowry Crossing TX custom patio cover builders | Keathley Landscaping

veneer installation McKinney Texas

drain Lucas Texas

Dallas TX covered patios | Keathley Landscaping

Plano TX custom patio cover cost | Keathley Landscaping

outdoor fireplaces Preston Hollow Dallas Texas

sod contractors McKinney Texas

landscape lighting installation Highland Park Texas

drain cleaning company near me McKinney Texas

cost of sod installation Frisco Texas

contemporary landscape lighting Allen Texas

Rose Hill TX outdoor living space contractors | Keathley Landscaping

channel drain cleaning Mobile City Texas

Lavon TX pergola builders | Keathley Landscaping

Dallas TX pergolas | Keathley Landscaping

best landscape lighting Lakewood Dallas Texas

drainage contractors near me Wylie Texas

drain cleaning company near me Allen Texas

Fairview TX
Garland TX
Highland Park TX
Lake Highlands Dallas TX
Lakewood Dallas TX
Lowry Crossing TX
McKinney TX
Mobile City TX
Preston Hollow Dallas TX
Richardson TX
Rockwall TX
Rose Hill TX
Recent Comments