
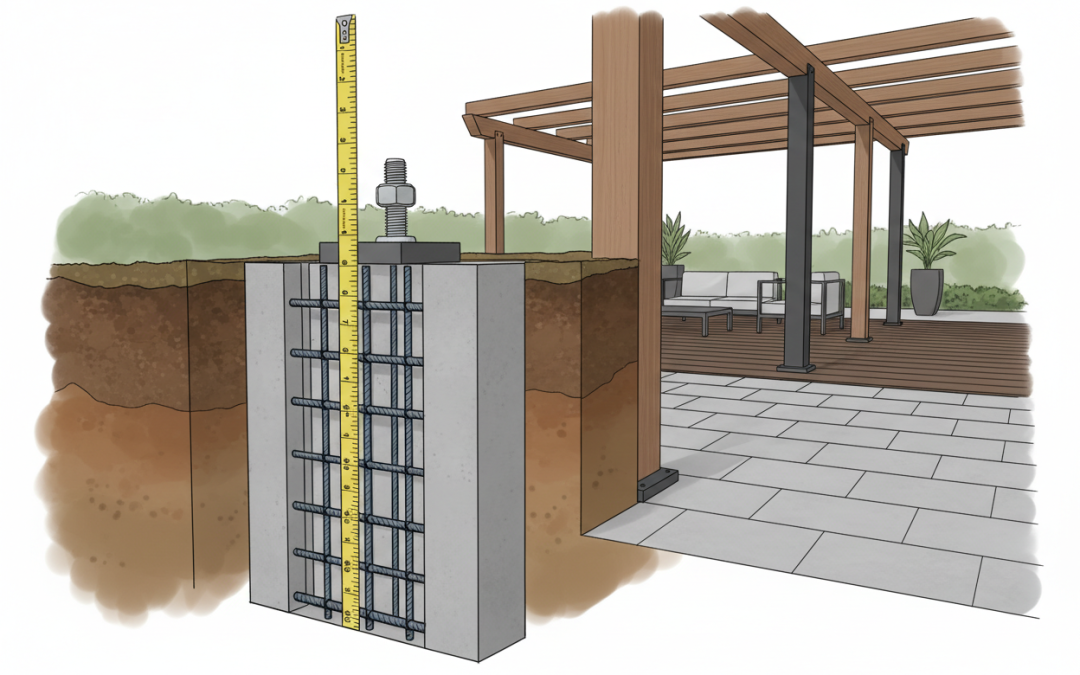
Custom Patio Cover Concrete Footings: Depth and Width Requirements
Table of Contents
1. Introduction
2. Understanding Concrete Footings for Patio Covers
3. Determining Proper Footing Depth
4. Calculating Footing Width Requirements
5. Factors That Influence Footing Specifications
6. Step-by-Step Installation Process
7. Common Mistakes to Avoid
8. Professional vs. DIY Considerations
9. Maintenance and Long-term Care
10. Frequently Asked Questions
11. Conclusion
Introduction
Building a custom patio cover is an exciting project that can transform your outdoor living space into a comfortable retreat. However, the success and longevity of your patio cover heavily depend on one crucial element that often gets overlooked: the concrete footings. These underground foundations are the unsung heroes that keep your structure stable, safe, and standing strong for decades to come.
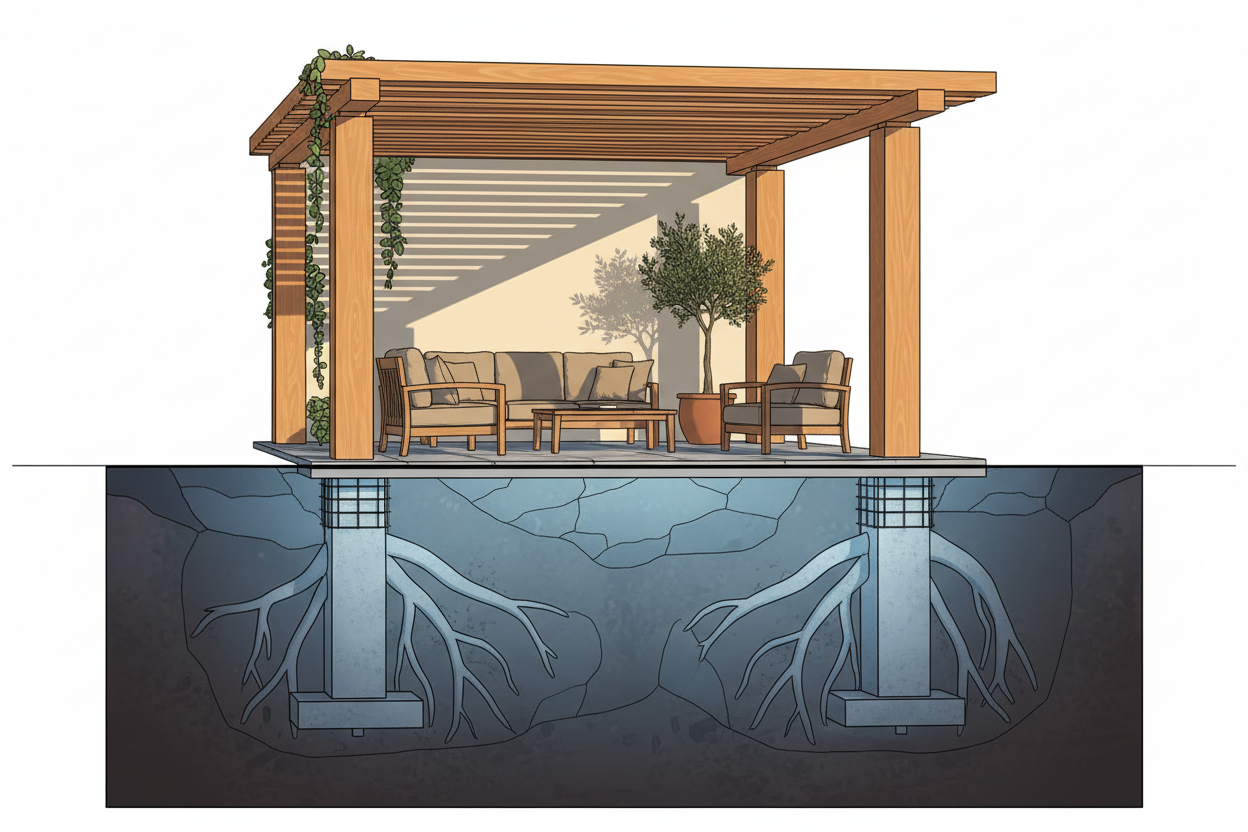
Whether you’re planning a simple lean-to cover or an elaborate pergola-style structure, understanding the proper depth and width requirements for concrete footings isn’t just recommended—it’s essential. Getting these measurements wrong can lead to costly repairs, structural failures, or even safety hazards down the road.
In this comprehensive guide, we’ll walk you through everything you need to know about concrete footing requirements for custom patio covers. From calculating the right dimensions to understanding local building codes, you’ll gain the knowledge needed to ensure your project stands the test of time.
Understanding Concrete Footings for Patio Covers
Concrete footings serve as the foundation system for your patio cover, transferring the structural load from the posts down into the ground. Think of them as the roots of a tree—they spread the weight over a larger area and anchor the structure against various forces including wind, snow loads, and seismic activity.
For patio covers, footings typically consist of concrete poured into excavated holes where support posts will be installed. The size and depth of these footings must be carefully calculated based on several factors, including the size of your cover, local climate conditions, and soil characteristics.
Unlike simple fence posts that might get away with smaller footings, patio covers often support significant overhead loads and must withstand lateral forces from wind. This means the footing requirements are more stringent and require careful planning to meet both local building codes and engineering standards.
Determining Proper Footing Depth
The depth of your concrete footings is perhaps the most critical measurement to get right. Too shallow, and your patio cover might shift or become unstable over time. Too deep, and you’re wasting materials and effort without gaining additional benefits.
The primary rule for footing depth relates to your local frost line—the maximum depth that ground freezes during winter months. Your footings must extend below this frost line to prevent frost heave, which occurs when frozen ground expands and can literally push your structure out of alignment.
In most temperate climates, the minimum footing depth ranges from 18 inches to 48 inches below ground level. However, this varies significantly based on geographic location. For instance, areas in northern Minnesota might require footings 60 inches deep, while southern California locations might only need 12-18 inches.
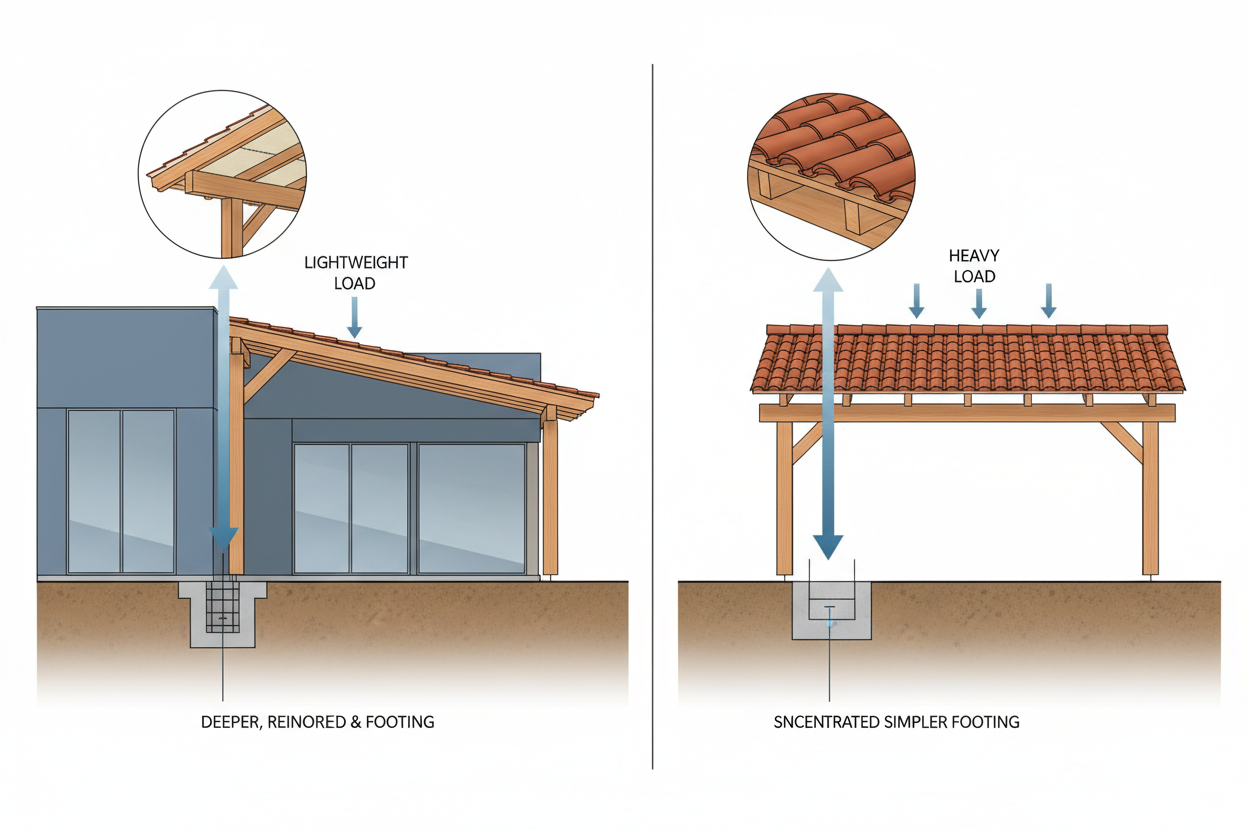
Beyond frost considerations, the depth also depends on your patio cover’s size and load requirements. Larger structures with heavier roofing materials typically need deeper footings to provide adequate stability. A general rule of thumb is that footing depth should equal at least one-third of the above-ground post height, though this can vary based on engineering requirements.
Calculating Footing Width Requirements
While depth prevents frost damage and provides stability, footing width determines how effectively the load spreads into the surrounding soil. Wider footings distribute weight over a larger area, reducing the pressure on any single point of soil and improving overall stability.
The minimum footing width for most patio cover applications starts at 16 inches, but this can increase significantly based on structural requirements. For lightweight covers with minimal wind exposure, 16-inch square footings might suffice. However, larger structures or those in high-wind areas often require footings 24 inches or even 36 inches wide.
Soil bearing capacity plays a crucial role in determining width requirements. Clay soils with good bearing capacity might support narrower footings, while sandy or loose soils require wider footings to achieve the same load distribution. This is where soil testing becomes valuable, especially for larger or more complex patio cover projects.
The relationship between footing width and post size also matters. Your footing should extend at least 6 inches beyond the post on all sides. So if you’re using 6×6 inch posts, your minimum footing width would be 18 inches to provide adequate bearing surface around the post.
Factors That Influence Footing Specifications
Several key factors determine the exact specifications for your patio cover footings, and understanding these helps ensure you design a foundation system that meets your specific needs.
Climate conditions top the list of considerations. Areas with freeze-thaw cycles require deeper footings, while regions with high winds need wider, more robust foundations. Snow loads also factor into the equation—if your area receives significant snowfall, your footings must support the additional weight that accumulates on the roof.
Soil conditions significantly impact footing requirements. Rocky soil provides excellent bearing capacity but can be challenging to excavate. Clay soil offers good stability when dry but may expand and contract with moisture changes. Sandy soil drains well but may require larger footings for adequate load distribution.
The patio cover design itself influences footing specifications. Attached covers that connect to your house may have different requirements than freestanding structures. The roofing material weight, from lightweight fabric to heavy tile, affects the load calculations. Even the architectural style matters—a simple shed roof creates different load patterns than a complex hip roof design.
Local building codes and permit requirements often dictate minimum footing specifications. These codes exist to ensure safety and typically reflect local climate conditions and soil characteristics. Always check with your local building department before finalizing your footing plans.
Step-by-Step Installation Process
Installing concrete footings for your patio cover requires careful planning and execution. While the process isn’t overly complex, attention to detail during each step ensures a strong, long-lasting foundation.
Start by marking the exact locations for each footing based on your patio cover plans. Use stakes and string lines to ensure accurate positioning and square corners. Double-check all measurements before beginning excavation, as moving footings after concrete is poured becomes extremely difficult and expensive.
Excavation comes next, and this is where having the right tools makes a significant difference. For most residential projects, a post-hole digger or small excavator works well. Dig holes to the required depth plus an additional 4-6 inches to allow for a gravel base. Keep the sides as vertical as possible and remove all loose soil and debris.
Install a gravel base in the bottom of each hole—typically 4-6 inches of compacted gravel provides drainage and a stable foundation for the concrete. This step is particularly important in areas with poor soil drainage or clay soils that might retain water.
Before pouring concrete, set your posts in position and brace them plumb and square. Some builders prefer to set posts after the concrete cures, but setting them during the pour often provides better alignment and stronger connections. Use temporary bracing to hold posts in perfect position during the concrete pour and curing process.
Common Mistakes to Avoid
Even experienced builders can make mistakes when installing patio cover footings, and learning from these common errors can save you time, money, and frustration.
Underestimating footing size ranks as the most frequent mistake. It’s tempting to save money by using smaller footings, but this false economy often leads to structural problems later. Always err on the side of larger footings rather than smaller ones—the additional cost is minimal compared to potential repair expenses.
Ignoring drainage considerations causes long-term problems in many installations. Footings that collect and hold water can experience freeze damage, soil erosion, or post deterioration. Always include proper drainage around footings, especially in areas with clay soil or poor natural drainage.
Rushing the curing process is another common error. Concrete needs time to reach full strength, and loading it too early can cause cracks or structural weakness. Allow at least 48 hours before removing braces and at least a week before applying significant loads to the structure.
Failing to check local building codes before starting can result in costly do-overs. Building departments may require permits, inspections, or specific footing specifications that differ from general guidelines. A quick call to your local building department can prevent major headaches later.
Professional vs. DIY Considerations
Deciding whether to tackle patio cover footings yourself or hire professionals depends on several factors, including your skill level, available time, and project complexity.
DIY installation can save significant money on labor costs and gives you complete control over the quality and timing of the work. If you’re comfortable with basic construction techniques and have access to the necessary tools, footing installation is within reach of most homeowners. The process is straightforward, and mistakes, while costly, are usually fixable.
However, certain situations call for professional installation. Complex soil conditions, large structures, or areas with strict building codes often benefit from professional expertise. Engineers or experienced contractors bring knowledge of local requirements and can handle unexpected challenges that arise during excavation.
Consider hiring professionals for the design phase even if you plan to do the installation yourself. A structural engineer can provide calculations and specifications that ensure your footings meet all safety requirements. This professional input often pays for itself by preventing over-building or, worse, under-building your foundation system.
The permit and inspection process also influences the DIY decision. Some jurisdictions require licensed contractors for structural work, while others allow homeowner installation with proper permits and inspections. Understanding local requirements helps you make an informed decision about professional involvement.
Maintenance and Long-term Care
Properly installed concrete footings require minimal maintenance, but periodic inspection and care can extend their lifespan and prevent small problems from becoming major issues.
Annual inspections should focus on drainage around footings and any signs of settling or movement. Look for cracks in the concrete, gaps between posts and footings, or any indication that the structure has shifted. Early detection of problems allows for easier and less expensive repairs.
Maintain proper drainage around footings by keeping gutters clean and ensuring water flows away from the foundation area. Remove accumulated leaves, debris, or soil that might trap moisture against the concrete or posts. Good drainage prevents many common footing problems and extends the life of wooden posts.
Address any cracks or damage promptly to prevent water infiltration and further deterioration. Small concrete cracks can often be sealed with appropriate repair compounds, while larger issues may require professional assessment and repair.
Consider applying protective coatings to exposed concrete surfaces in harsh climates. While not always necessary, these coatings can help prevent freeze damage and extend footing life in areas with severe weather conditions.
Frequently Asked Questions
How deep should patio cover footings be in my area?
Footing depth depends on your local frost line, which varies by geographic location. Contact your local building department or check frost line maps for your area. Generally, footings should extend 6-12 inches below the frost line, with minimum depths ranging from 18-48 inches in most locations.
Can I use pre-cast concrete footings instead of poured concrete?
Pre-cast footings can work for smaller patio covers but may not provide adequate size or strength for larger structures. Poured concrete footings offer better customization and typically provide superior strength and stability for most applications.
What’s the minimum concrete strength required for patio cover footings?
Most building codes require concrete with a minimum compressive strength of 2,500 PSI for footing applications. However, 3,000 PSI concrete is commonly used and provides better durability with minimal additional cost.
Do I need rebar in my patio cover footings?
Rebar requirements depend on footing size and local building codes. Footings larger than 24 inches typically benefit from rebar reinforcement, and some jurisdictions require it regardless of size. Check local codes and consider adding rebar for improved strength and crack resistance.
How long should I wait before building on new concrete footings?
Allow concrete to cure for at least 48 hours before removing braces and 7 days before applying significant loads. Full strength develops over 28 days, but most construction can proceed after one week with proper curing conditions.
What happens if my footings aren’t deep enough?
Shallow footings can experience frost heave, causing the structure to shift or become unstable. In severe cases, you may need to excavate around existing footings and extend them deeper, or completely replace them with properly sized footings.
Conclusion
Building a custom patio cover with proper concrete footings is an investment in both your home’s value and your family’s enjoyment of outdoor spaces. While the footing requirements might seem complex, understanding the basic principles of depth and width calculations ensures your structure will provide decades of reliable service.
Remember that footing specifications aren’t arbitrary numbers—they’re based on engineering principles designed to keep your patio cover safe and stable under all conditions. Taking the time to calculate proper dimensions, considering local climate and soil conditions, and following building codes creates a foundation system that supports your investment for years to come.
Whether you choose to tackle the installation yourself or hire professionals, the knowledge gained from understanding footing requirements helps ensure your project succeeds. Don’t view proper footings as an unnecessary expense, but rather as insurance against future problems and the foundation for countless hours of outdoor enjoyment.
Your custom patio cover represents more than just a construction project—it’s an enhancement to your lifestyle and a gathering place for family and friends. Starting with properly designed and installed concrete footings ensures this investment serves you well for decades to come.

Parker TX custom pergolas | Keathley Landscaping

Mobile City TX luxury custom pergolas | Keathley Landscaping

Rose Hill TX custom pergolas | Keathley Landscaping

Plano TX covered patio contractors near me | Keathley Landscaping

Lake Highlands Dallas TX pergolas | Keathley Landscaping

Frisco TX custom patio cover cost | Keathley Landscaping

Dallas TX pergola companies near me | Keathley Landscaping

Fate TX custom patio cover cost | Keathley Landscaping

Garland TX covered patio contractors near me | Keathley Landscaping

Frisco TX custom pergolas | Keathley Landscaping

Lavon TX luxury custom pergolas | Keathley Landscaping

McKinney TX pergola companies near me | Keathley Landscaping

Parker TX outdoor living space contractors | Keathley Landscaping

Murphy TX covered patio contractors near me | Keathley Landscaping

Frisco TX pergola companies near me | Keathley Landscaping

Richardson TX custom wood pergola | Keathley Landscaping

Mobile City TX covered patios | Keathley Landscaping

Dallas TX luxury custom pergolas | Keathley Landscaping

Lucas TX pergolas | Keathley Landscaping

Murphy TX custom patio covers | Keathley Landscaping

Dallas TX custom patio cover builders | Keathley Landscaping

Lowry Crossing TX pergola builders | Keathley Landscaping

McKinney TX custom patio covers | Keathley Landscaping

Dallas TX covered patio contractors near me | Keathley Landscaping

Rose Hill TX pergola builders | Keathley Landscaping

Plano TX custom pergolas | Keathley Landscaping

McKinney TX pergolas | Keathley Landscaping

Dallas TX custom patio covers | Keathley Landscaping

sod lawn installation Rockwall Texas

price for sod installation Lavon Texas

sod installation service Highland Park Texas

sod grass installation Allen Texas

grass contractor Richardson Texas

price for sod installation Frisco Texas

cost of sod and installation Allen Texas

cost of sod and installation Lowry Crossing Texas

cost of sod and installation Murphy Texas

sod company Rockwall Texas

cost of sod and installation Preston Hollow Dallas Texas

sod installation near me Dallas Texas

sod installation companies near me Lakewood Dallas Texas

sod installation near me Rose Hill Texas

lawn sod installation near me Fate Texas

sod installation companies near me McKinney Texas

cost of sod and installation Lakewood Dallas Texas

lawn sod installation Lucas Texas

cost of sod and installation Dallas Texas

sod installation services Lucas Texas

installation of sod cost Wylie Texas

sod installation companies Lucas Texas

sod contractors Rose Hill Texas

grass installation Lucas Texas

price of sod installation Wylie Texas

sod installation service Lavon Texas

price of sod installation Garland Texas

new sod installation Rockwall Texas

drainage company near me Lowry Crossing Texas

drainage company Lake Highlands Dallas Texas

drain cleaning company near me Lake Highlands Dallas Texas

drainage company near me Preston Hollow Dallas Texas

outdoor drain repair Lavon Texas

drainage solutions near me Sachse Texas

yard drainage Fate Texas

channel drain cleaning Allen Texas

landscape drainage Lake Highlands Dallas Texas

drainage company Frisco Texas

landscape drainage contractor near me Lavon Texas

drainage Lavon Texas

landscape drainage contractor near me Lake Highlands Dallas Texas

drainage specialist near me Lucas Texas

drain cleaning company near me Rowlett Texas

drainage specialist near me Dallas Texas

drainage company near me McKinney Texas

landscape drainage Murphy Texas

drain Murphy Texas

drain contractor Lavon Texas

drainage specialist near me Sachse Texas

drainage specialist near me Rowlett Texas

landscape drainage contractor near me Allen Texas

drain contractor Dallas Texas

landscape drain Lucas Texas

drain cleaning company near me Preston Hollow Dallas Texas

drain Plano Texas

Recent Comments